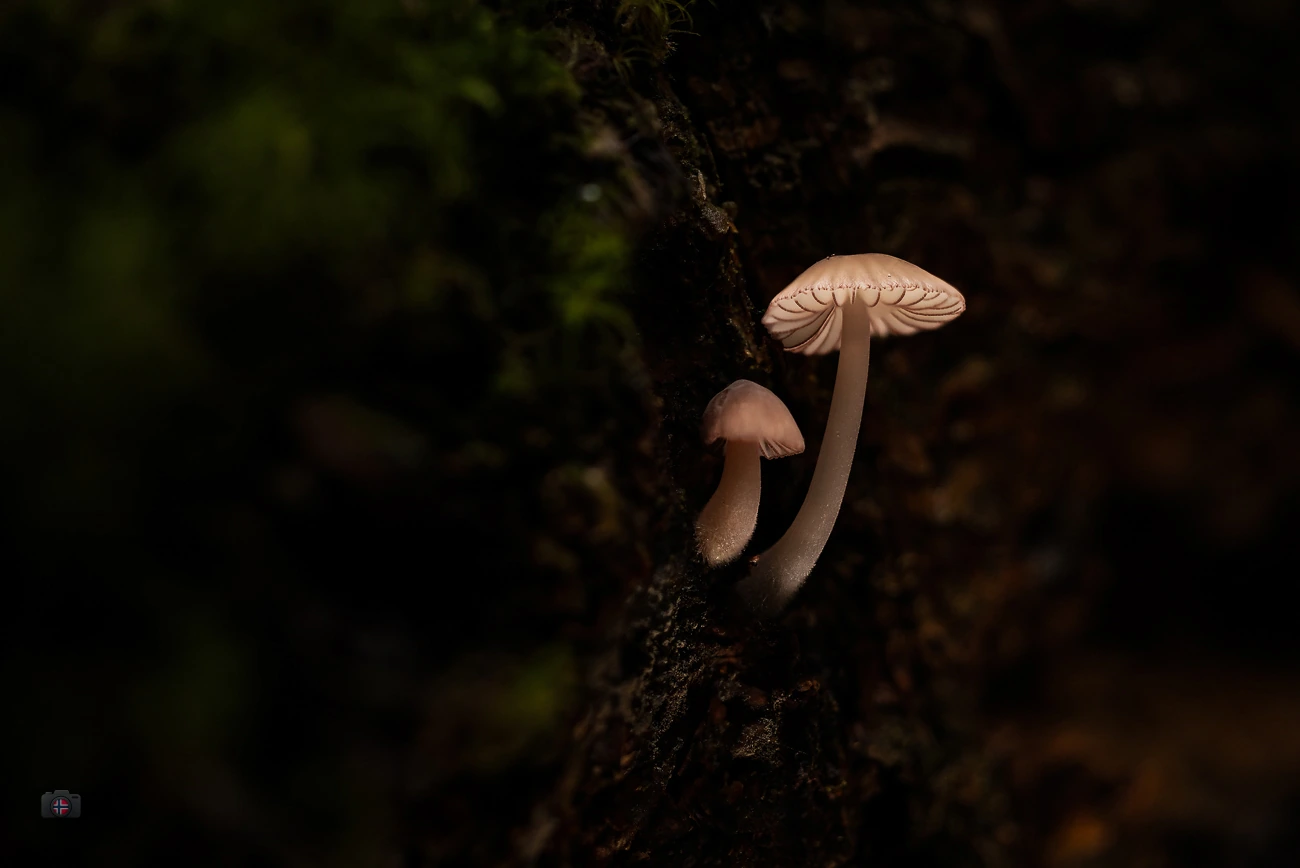
A mushroom is not exactly a subject that demands attention. It grows somewhere in the moss, among wet leaves and old branches. I often walk past it at first. Then the light catches the edge of its cap, and suddenly there is a shape worth looking at. The rest of the forest can wait.
Photographing mushrooms in the forest means looking a little more carefully. There is a surprising amount going on at this small scale: curved gills, delicate surfaces, a pale stem against a dark background. I do not need a spectacular setting to make a good photograph. The viewpoint, the light and the decision about what should be in focus matter far more.
When I photograph them, I pay closest attention to focus, light and a background that does not compete with the subject. Camera settings help me get there. Here is how I approach them in the forest.
Mushroom photography begins with the viewpoint
I make the first decision before changing a single camera setting. From above, a mushroom often looks like a small cap lost among leaves. When I get lower and work at the mushroom’s level, the image changes. The stem gains space, the cap stands out and the background seems to move farther away.
Sometimes the camera is almost on the ground. I look for an angle that makes the background less distracting. A bright twig beside the cap bothers me more than a little moss in the foreground. Taking one step sideways or moving the camera a few centimetres lower can change the entire photograph.
I also try not to damage the surroundings for the sake of a photograph. I do not pull out plants just to create a tidy background. Usually I can solve the problem with framing, a different angle or a change in depth of field. And if it still does not work, I look for another mushroom.
The best camera settings for mushroom photography
Useful camera settings depend on the size of the mushroom, the lens, the shooting distance and, of course, the light. Forests are often dark. I still do not try to force the same settings onto every subject. This table is a starting point, not a set of rules.
| Setting | Starting point | What matters |
|---|---|---|
| File format | RAW | More flexibility for highlights, shadows and white balance |
| Camera mode | Aperture priority or manual | Choose the aperture and exposure deliberately |
| Aperture | f/4 to f/8 | For very close subjects, possibly f/11; check depth of field |
| ISO | 100–400 with a tripod | Increase as needed handheld; sharpness comes first |
| Shutter speed | Handheld at 100mm, often 1/160–1/250 sec as a starting point | Check movement, stabilisation and camera shake |
| Focus | Single focus point or manual focus | Place it on the cap edge, gills or another important detail |
| White balance | Auto when shooting RAW | Check green casts and warmer light afterwards |
The settings in the table are starting points. With a tripod and a completely still subject, longer shutter speeds are possible. If a thin mushroom moves in the wind, however, a tripod does not solve that problem. I need a faster shutter speed or more light.
Which aperture is right for photographing mushrooms?
Aperture has a major influence on how much of the mushroom appears sharp. At f/2.8 or f/4 I can isolate a small area and allow the background to become soft. At macro distances, though, depth of field is so shallow that the front edge of the cap may be sharp while everything behind it falls out of focus.
If I want to show more of the subject, I often begin at f/5.6 or f/8. For particularly close photographs, f/11 can make sense. Stopping down farther is not a free solution: diffraction at small apertures can reduce fine detail. That is why I check the image at a magnified view on the camera screen.
A completely sharp mushroom is not automatically the strongest photograph. Sometimes a sharply defined cap edge is enough to make the whole shape understandable. I care about where the viewer looks, and that is where I want the focus to be.
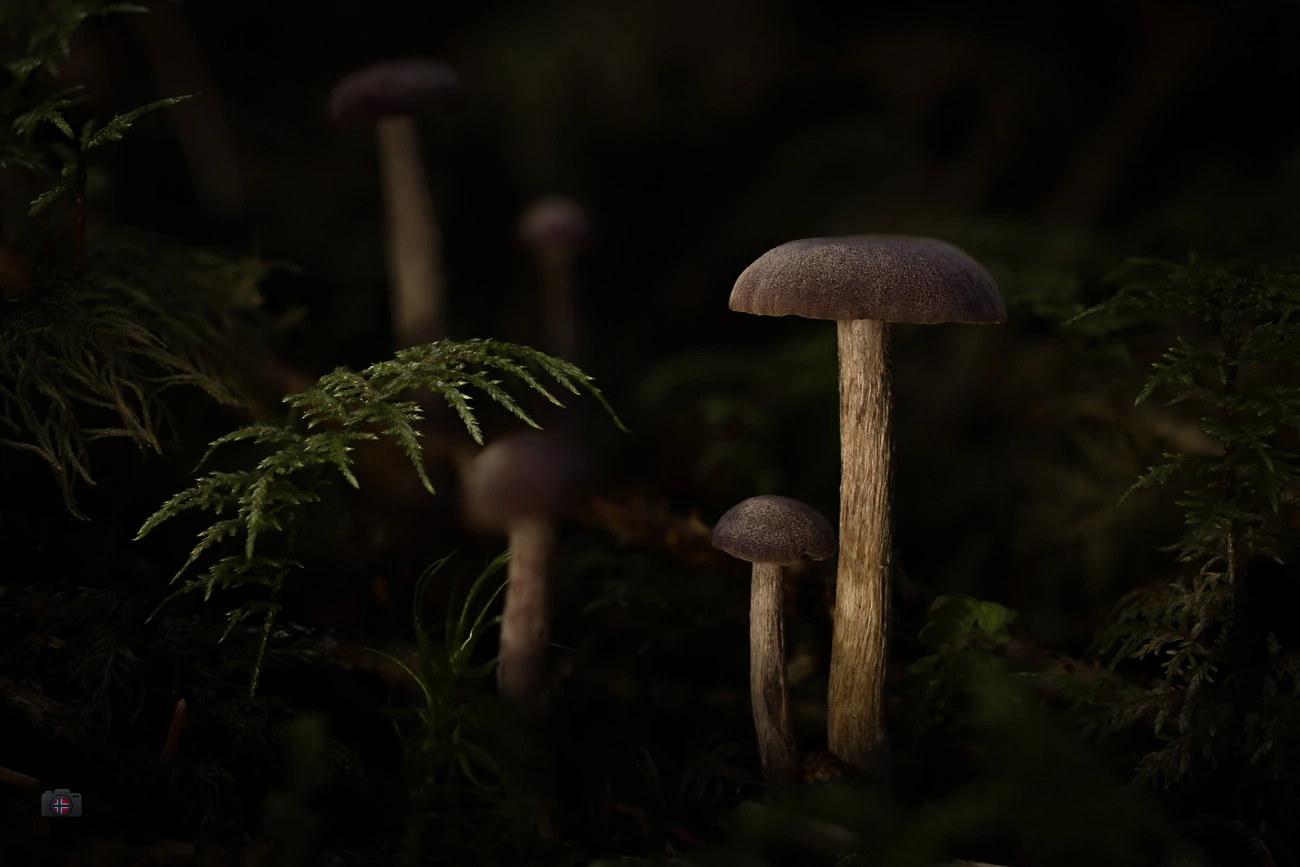
Macro lens or zoom: Which lens should you use?
For small mushrooms and delicate structures, I like using my 100mm macro lens. It allows me to make details large in the frame while maintaining some working distance. That is especially useful for gills, droplets and tiny surface textures.
You can photograph mushrooms well without a macro lens. With my RF 24–70mm f/2.8 I can show a mushroom as part of the forest: a small pale cap under a root, or a group growing in the moss. Those photographs say more about the place. Macro, by comparison, draws me deep into the shape itself.
When I want fine detail, I choose the macro. If the surrounding forest matters, I often prefer the zoom. If you are starting out, find out how close the lens you already own can focus. A good viewpoint is usually cheaper than your next purchase.
Focusing on mushrooms: When millimetres matter
With a small subject, even a slight change in distance makes a difference. I focus on a recognisable detail: the front edge of the cap, a gill, or the place where light touches the surface. Autofocus can handle that when there is enough contrast. In a dark forest it does not always work reliably.
When autofocus struggles, I switch to manual focus and magnify the view on the screen. A tripod is especially useful for macro photographs, because the camera no longer moves slightly forward or backward with every breath. Focus peaking can help me find the right area, but magnifying the image is often better for checking the exact plane of sharpness.
If I want the entire mushroom sharp at high magnification, focus stacking is an option. I take several frames with the focus plane shifted slightly between them and combine them later. The mushroom and camera should remain as still as possible throughout. Lightroom Classic is useful for reviewing the RAW files, while the actual merging requires suitable software such as Photoshop.
Natural light for mushroom photography
I rarely find a mushroom that is evenly lit in the forest. I do not mind that. A little side light can give the cap shape and make the gills visible. Soft light after rain or under an overcast sky also helps avoid harsh reflections on wet surfaces.
I move around the subject and watch what happens behind it. If a bright opening between trees sits directly behind the mushroom, the cap may lose its impact. A different viewpoint might place a dark root behind it instead. Suddenly there is clear separation. That is one of the easiest ways to photograph mushrooms against a dark background.
Backlighting can reveal fine edges and water droplets, but it is not always the best choice. If the gills disappear into shadow, I may lose the very detail I wanted to show. The subject makes the decision, not a rule.
Photographing mushrooms with additional light
In my dark forest photographs I sometimes use an additional light source. I position a small LED light to illuminate the mushroom or one part of it. I prefer side lighting because it brings out texture and shape without lighting up the entire forest floor.
Hard, direct light can look artificial very quickly, especially when it creates bright reflections on a wet cap. Moving the light farther away or using suitable diffusion makes it softer. Soft light from above and to one side often looks more natural than shining a lamp straight at the mushroom from the front.
Additional light can also help me keep ISO lower or use a faster shutter speed. But the purpose is to reveal a shape that is already there. I am not interested in turning every unassuming mushroom into a brightly lit stage.
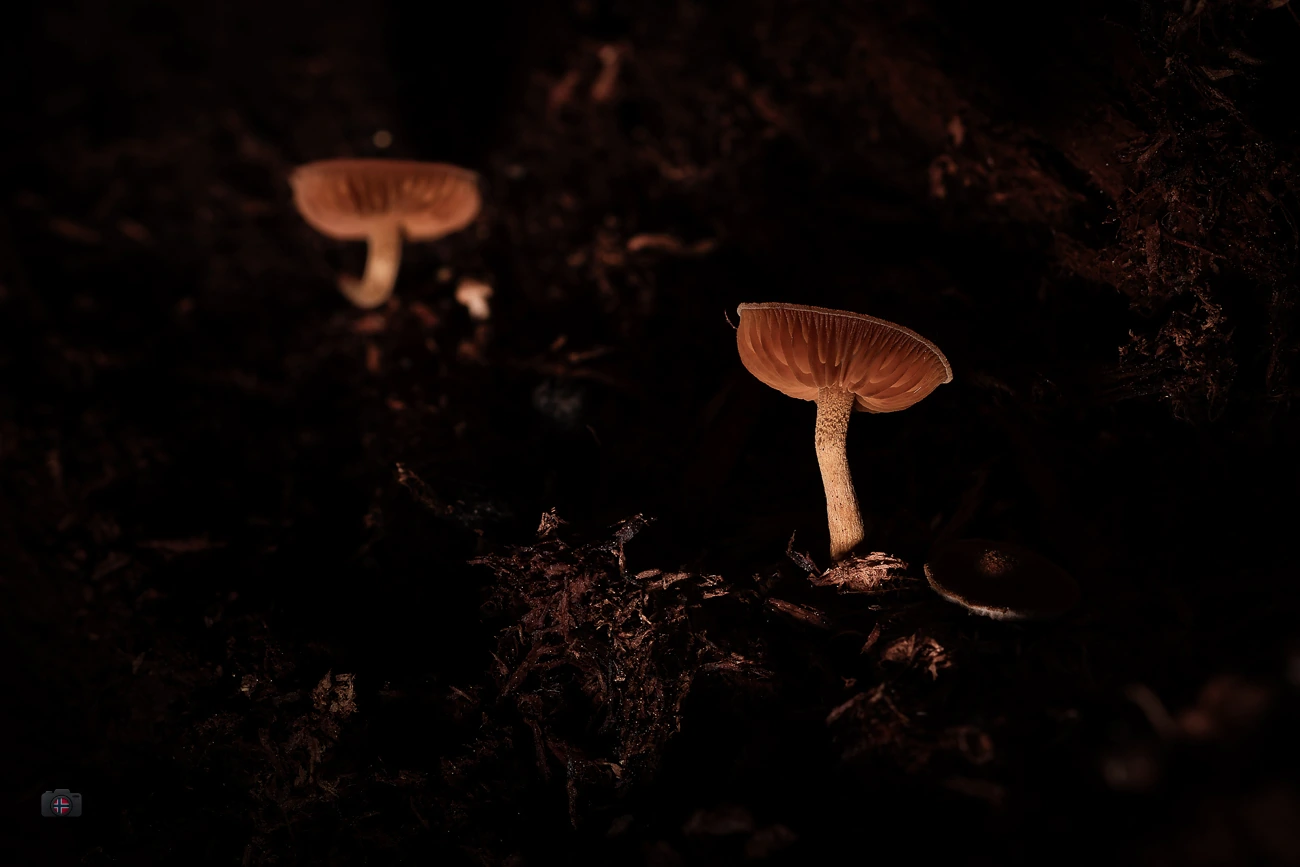
How to photograph mushrooms with dark backgrounds
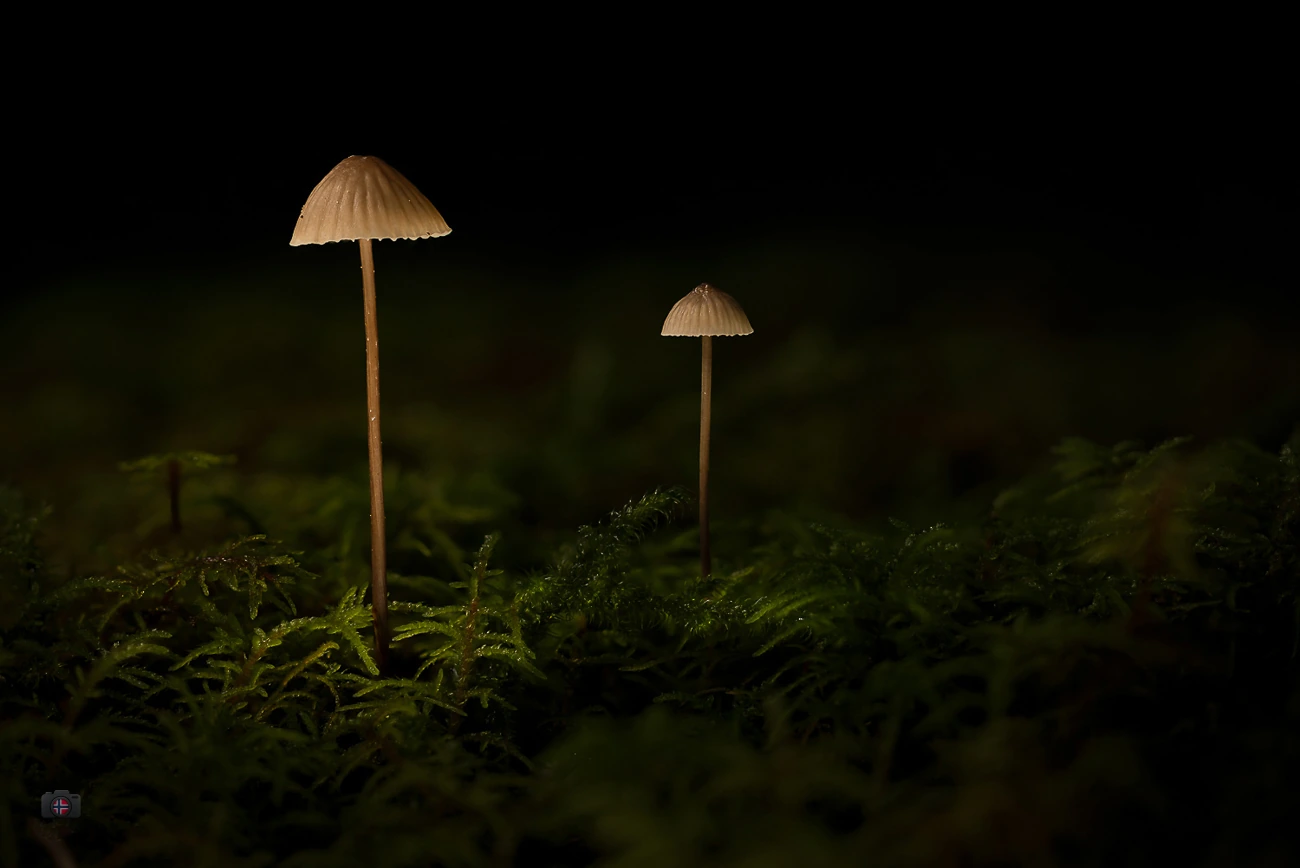
A dark background is one of the visual tools I enjoy most. A pale mushroom suddenly carries more weight when the surroundings retreat. The best place to start is during the exposure: I look for real shadows behind the subject, keep some distance between mushroom and background, and watch out for bright twigs at the edges of the frame.
I expose for the mushroom and the important highlights. If the background then falls into darkness, that may be exactly right. But I do not simply make the entire image darker until the subject loses its detail too. Those fine structures are what make the photograph interesting.
I describe a similar approach to light and dark backgrounds in Photographing Ferns: Light and Camera Settings. The aim is much the same: separating a small subject from the visual clutter of the forest.
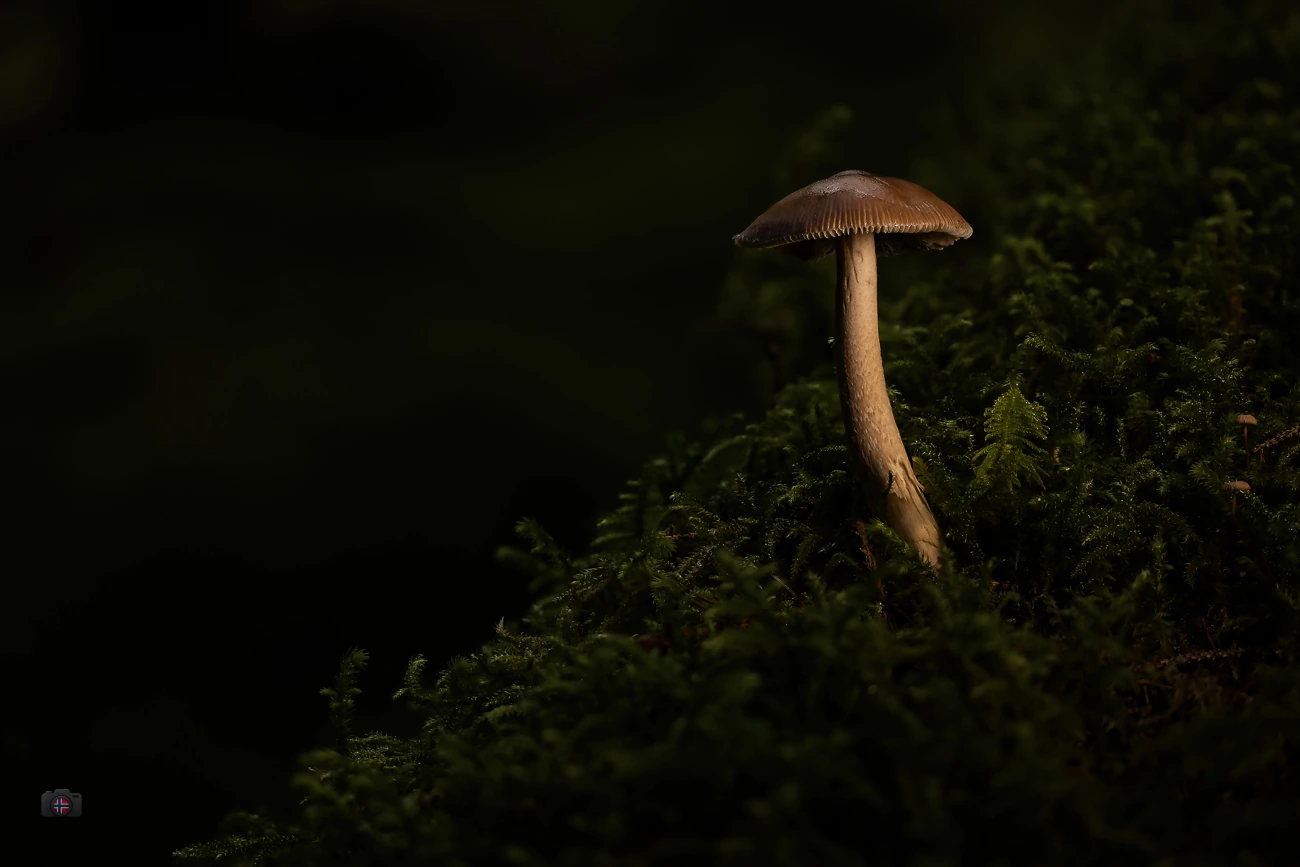
Composition: A mushroom does not always belong in the centre
A single mushroom can have real presence when I give it space. I do not automatically place it in the middle. Sometimes the area next to it interests me almost as much as the mushroom itself. It can be dark or blurred. The eye still finds the subject.
With groups of mushrooms I look for a clear relationship between shapes: one larger cap with two smaller ones, a line of stems, or an interesting gap. An untidy cluster can be appealing, but not every jumble automatically becomes a good composition.
Then there are the small details: a broken edge, water on a cap or a single reflection inside a gill. A photograph does not have to explain the entire mushroom. Sometimes a fragment is enough.
Photographing mushrooms after rain
After rain I often find especially interesting conditions in the forest. Colours look richer, moss and wood are darker and many mushrooms carry tiny droplets. The ground is wet, though, and moisture can collect on the lens. A microfibre cloth and something to protect the camera or tripod on the ground are useful.
Droplets can add to the subject, but they can also create distracting bright spots. I look carefully before pressing the shutter. Shutter speed matters too: if leaves or thin stems move in the wind, a long exposure will quickly blur them.
Editing mushroom photographs in Lightroom
When I edit in Lightroom Classic, I begin with white balance, exposure and tonal adjustments. Forest light can introduce a noticeable green cast. I correct it gently so the mushroom still looks natural. Then I pay attention to the highlights on the cap and the shadows around it.
Local masks let me draw attention to the most important structure without changing everything else. Sometimes all I need is to brighten the mushroom slightly and quieten the background. In my fine-art work, darkness is often intentional. I have no desire to reveal every root and twig that was hidden in the scene.
I use sharpening and noise reduction selectively. Too much sharpening brings out every speck and distracting strand of moss. Too much noise reduction can make delicate gills disappear. To me, an edit works when the subject becomes stronger and the editing itself stays out of the spotlight.
Common mistakes in mushroom photography
When a mushroom photograph does not work, I usually check four things: the camera angle is too high, the background is too busy, the important focus plane is missed or the lighting is too flat. Checking those points first often helps more than buying another lens.
It is also worth looking carefully through the entire frame after changing position. A background that was dark a moment ago may suddenly contain a bright branch. And something that looked sharp at f/8 may already be outside the focus plane after a small movement.
Frequently asked questions about photographing mushrooms
What camera settings work for mushrooms in the forest?
RAW, a deliberately chosen aperture around f/4 to f/8 and a precise focus point are good starting choices. At high magnification, stopping down farther can help. ISO and shutter speed depend on whether you are working handheld or with a tripod.
What aperture should I use for mushroom macro photography?
Wider apertures give a softer background. If you want more of the cap and stem sharp, start somewhere between f/5.6 and f/11 and inspect the result. At very close distances, even f/11 may provide little depth of field.
How do I create a black background in mushroom photography?
First find a naturally dark background, adjust your viewpoint and try lighting mainly the mushroom. Careful exposure and subtle local editing can strengthen the separation. Make sure the mushroom keeps its important surface detail.
Do I need a macro lens to photograph mushrooms?
No. A zoom lens can work very well, especially when the forest surroundings are part of the image. A macro lens becomes useful when you want to show very small mushrooms or fine details at greater magnification.
Is a tripod useful for mushroom photography?
Yes, especially in low light, with a low shooting position or when focusing manually. In wind, though, a tripod only prevents camera movement. It cannot stop a mushroom or surrounding leaves from swaying.
My conclusion: Take the small subject seriously
What I like about mushroom photography is how much it slows me down. I have to look, get close to the ground and work with the light that is actually there. Sometimes I add a small lamp. Often it takes only a few minutes and a change of angle before an unassuming subject becomes something of its own.
Camera settings help me capture that effect. First, I need to know what interested me about the subject: its shape, a texture or a narrow edge of light. That choice guides my focus, framing and exposure.
You can see more of this dark, atmospheric approach in Mysterious Mushrooms in the Dark Forest, where I tell the story behind the photographs.